はじめに
この記事は every Tech Blog Advent Calendar 2023 の17日目の記事です。
先日 DELISH KITCHEN アプリにライブ配信機能が追加されました。
開発をはじめてから2ヶ月弱を経て、ついにリリースです。
今回はライブ配信画面の UI でソフトウェアキーボードの動きに追従する View の実装を簡単なサンプルを用いて紹介したいと思います。
ゴール
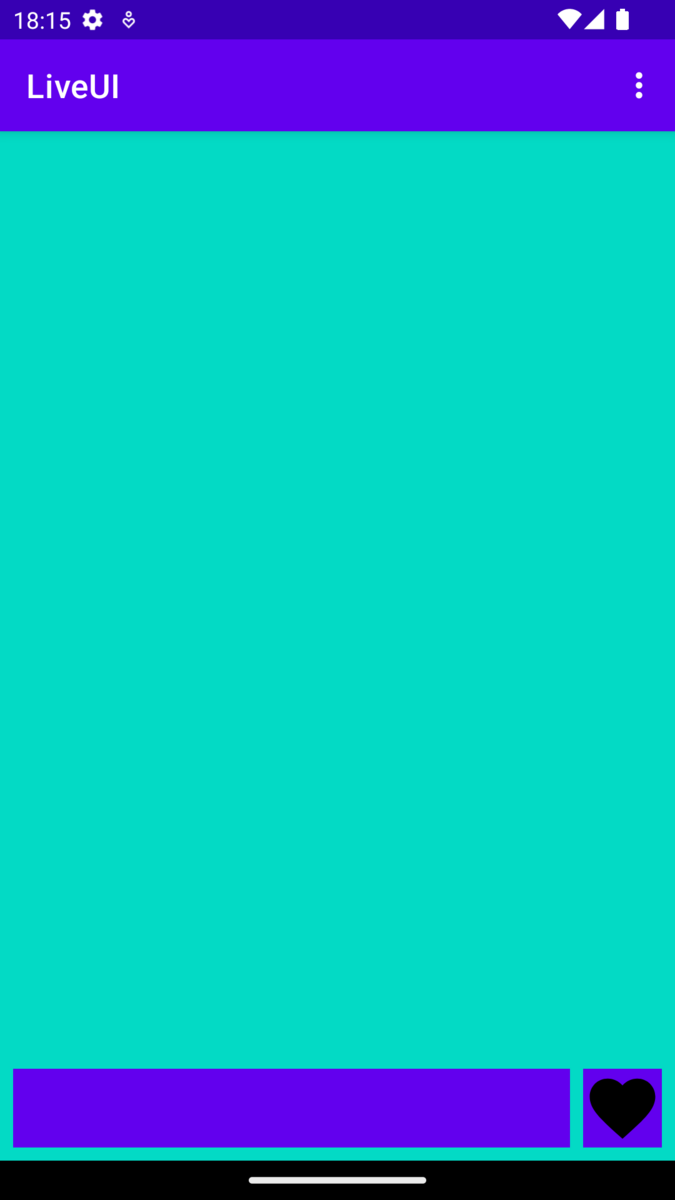
コメントにフォーカスを当てるとソフトウェアキーボードが表示され、コメントはキーボードの上部に追従する。この動きを作っていきます。
仕様
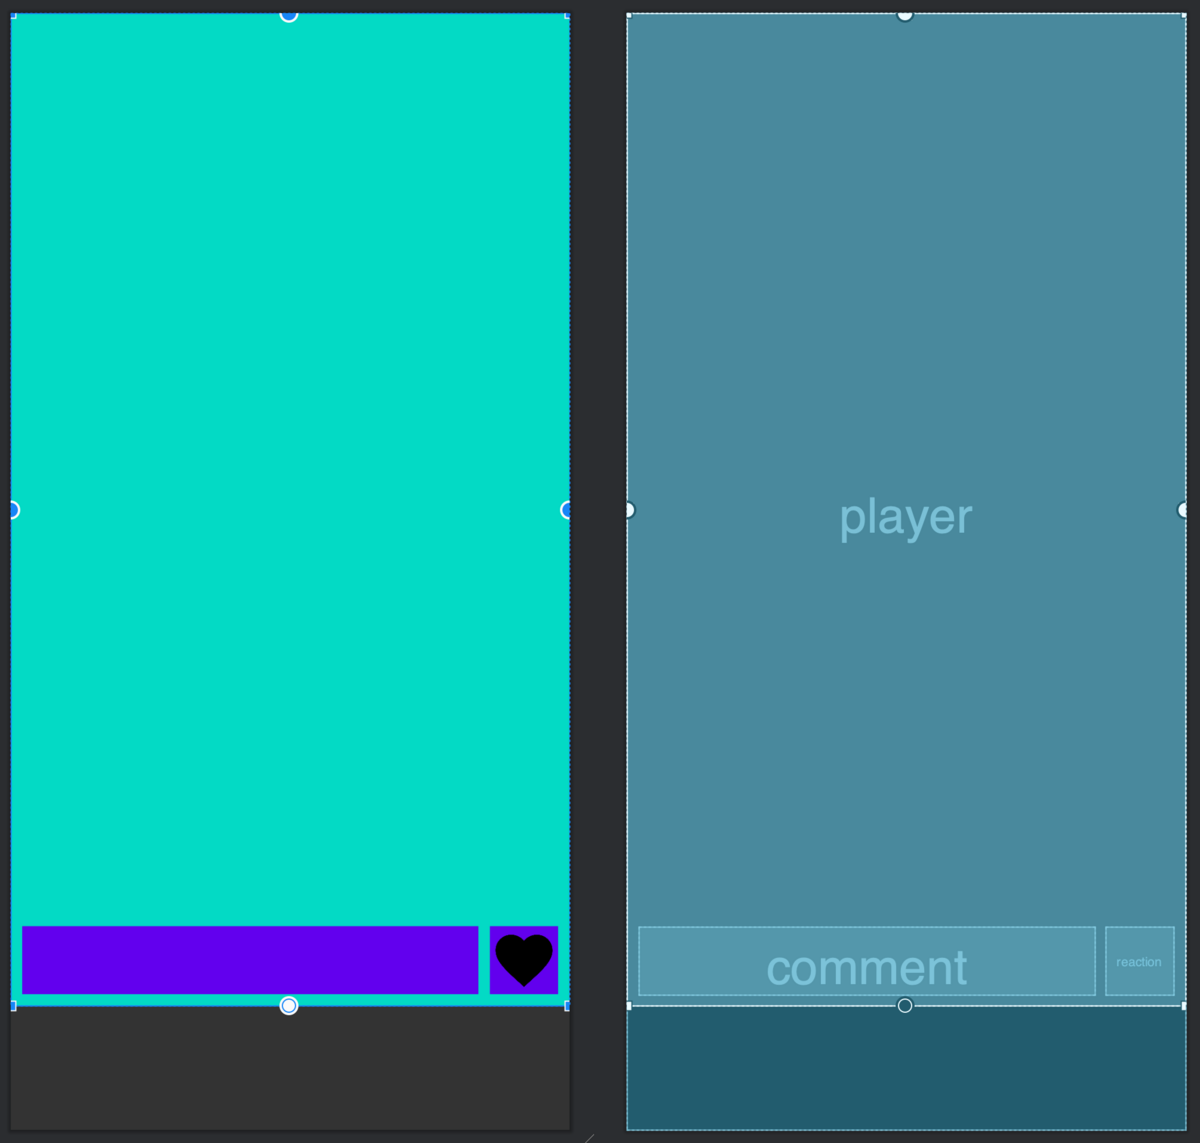
構成要素は次の3つです。
- 動画プレイヤーの View
- コメントの EditText
- いいねの ImageView
動作仕様は次の通りです。
- 動画プレイヤーは 16:9 の表示
- いいねボタンは固定
- コメントはソフトウェアキーボードに追従し、ソフトウェアキーボードが表示されると幅いっぱいに広がる
また、端末によって画面サイズが異なるため、コメントといいねボタンの位置は固定表示ではなく調整する必要があります。そこで画面サイズに応じた配置は次のように決めます。
- 画面の高さに余裕がある
- 動画プレイヤーの下に配置
- 動画プレイヤー下に余白があるが、コメントやいいねボタンを配置できるほどの高さがない
- 動画プレイヤーの内側で下に配置
- 動画プレイヤー下に一切余白がない
- ルートコンテナの下に配置
レイアウトの定義
AndroidManifest.xml
はじめに Activity に android:windowSoftInputMode を指定します。adjustResize はソフトウェアキーボードが表示されると Activity のメインウインドウがリサイズされる指定です。
<activity
    android:name=".MainActivity"
    android:exported="true"
    android:windowSoftInputMode="adjustResize"
activity_main.xml
<?xml version="1.0" encoding="utf-8"?>
<androidx.constraintlayout.widget.ConstraintLayout
    ...
    >

    <View
        android:id="@+id/player"
        android:layout_width="0dp"
        android:layout_height="0dp"
        app:layout_constraintDimensionRatio="w,16:9"
        app:layout_constraintEnd_toEndOf="parent"
        app:layout_constraintStart_toStartOf="parent"
        app:layout_constraintTop_toTopOf="parent"
        />

    <!-- button_size: 48dp -->
    <androidx.appcompat.widget.AppCompatImageView
        android:id="@+id/reaction"
        android:layout_width="@dimen/button_size"
        android:layout_height="@dimen/button_size"
        android:layout_marginVertical="8dp"
        android:layout_marginEnd="8dp"
        android:src="@drawable/baseline_favorite_24"
        app:layout_constraintBottom_toBottomOf="@id/player"
        app:layout_constraintEnd_toEndOf="parent"
        />

    <!-- いいねボタンと高さを揃える -->
    <androidx.appcompat.widget.AppCompatEditText
        android:id="@+id/comment"
        android:layout_width="0dp"
        android:layout_height="@dimen/button_size"
        android:layout_margin="8dp"
        android:paddingHorizontal="8dp"
        app:layout_constraintBottom_toBottomOf="@id/player"
        app:layout_constraintEnd_toStartOf="@id/reaction"
        app:layout_constraintStart_toStartOf="parent"
        />
</androidx.constraintlayout.widget.ConstraintLayout>
レイアウトは動画プレイヤーとコメント、いいねボタンをシンプルに並べています。 コメントといいねボタンは動画プレイヤーの内側に表示されるよう制約をつけています。
ちなみに、動画プレイヤーの下には制約をつけていません。 これは動画を画面幅いっぱいに表示させるためです。 そのため画面サイズによっては動画プレイヤーの下が見切れることになります。
以下、レイアウトのプレビューです。
画面サイズに合わせて制約をつける
レイアウトに定義した各 View の高さを取得して制約をどこにつけるか計算します。
private fun setupController() {
    val root = binding.root.height
    val content = binding.player.height
    val button = binding.reaction.height + margin * 2

    when {
        // 動画プレイヤーが画面に収まらない
        root < content -> ConstraintTo.ON_ROOT
        // 動画プレイヤー下に予約が足りずコントローラーが収まらない
        root < (content + button) -> ConstraintTo.ON_SCREEN
        // 動画プレイヤーとボタンを含めた高さが画面に収まる
        root >= (content + button) -> ConstraintTo.UNDER_SCREEN
        else -> null
    }?.let { constraintTo ->
        // TODO: 各 View に制約をつける
    }
ConstraintTo... は定義した enum です。
enum class ConstraintTo {
    ON_ROOT,
    ON_SCREEN,
    UNDER_SCREEN,
}
この処理は onWindowFocusChanged で実行します。onWindowFocusChanged はフォーカスがメインウインドウに当たる・外れるタイミングで実行されるのでパラメータの hasFocus でフォーカスが当たったタイミングを判別します。
override fun onWindowFocusChanged(hasFocus: Boolean) {
    if (hasFocus) setupController()
計算した ConstraintTo でコメントといいねボタンの制約を変更します。各 View にはレイアウトで既に制約がついているので、はじめに制約をクリアしてから ConstraintTo に応じた制約を追加します。
この処理は、コメントといいねボタンの両方で使えるよう拡張関数として定義しています。
fun View.constraintTo(
    root: ConstraintLayout,
    player: View,
    margin: Int,
    constraintTo: ConstraintTo
) {
    ConstraintSet().apply {
        clone(root)
        clear(id, ConstraintSet.BOTTOM)
        when (constraintTo) {
            ConstraintTo.ON_SCREEN -> {
                connect(
                    id,
                    ConstraintSet.BOTTOM,
                    player.id,
                    ConstraintSet.BOTTOM,
                    margin
                )
            }
            ConstraintTo.UNDER_SCREEN -> {
                connect(
                    id,
                    ConstraintSet.TOP,
                    player.id,
                    ConstraintSet.BOTTOM,
                    margin
                )
            }
            ConstraintTo.ON_ROOT -> {
                connect(
                    id,
                    ConstraintSet.BOTTOM,
                    ConstraintSet.PARENT_ID,
                    ConstraintSet.BOTTOM,
                    margin
                )
            }
        }
        applyTo(root)
    }
}
計算した ConstraintTo を使い、コメントといいねボタンに制約をつけます。
これでコメントといいねボタンの配置はできました。
when {
    // 動画プレイヤーが画面に収まらない
    root < content -> ConstraintTo.ON_ROOT
    // 動画プレイヤー下に予約が足りずコントローラーが収まらない
    root < (content + button) -> ConstraintTo.ON_SCREEN
    // 動画プレイヤーとボタンを含めた高さが画面に収まる
    root >= (content + button) -> ConstraintTo.UNDER_SCREEN
    else -> null
}?.let { constraintTo ->
    binding.reaction.constraintTo(
        root = binding.root,
        player = binding.player,
        margin = margin,
        constraintTo = constraintTo
    )
    binding.comment.constraintTo(
        root = binding.root,
        player = binding.player,
        margin = margin,
        constraintTo = constraintTo
    )
実際に異なる画面サイズのエミュレータで動かしてみると、次のようになります。
| ルートView | プレイヤー内 | プレイヤー下 |
|---|---|---|
 |
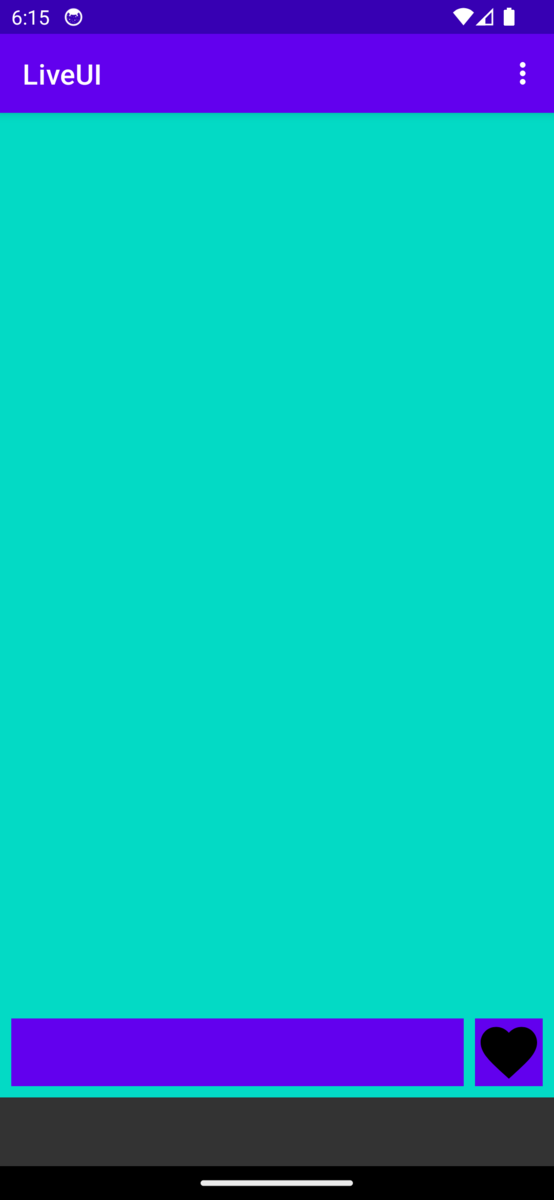 |
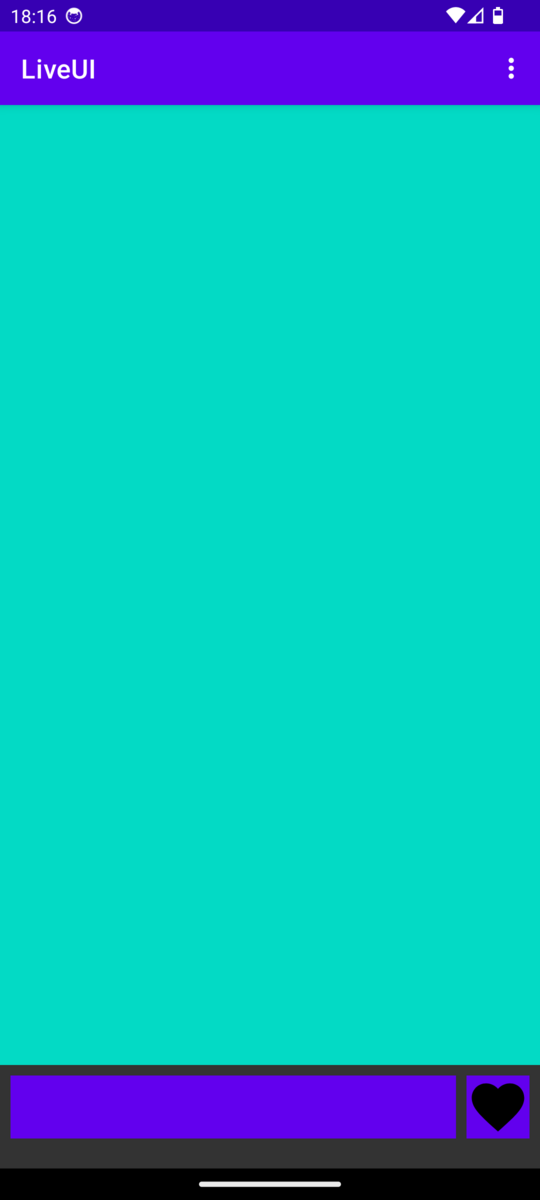 |
キーボードの動きを検知する
キーボードの動きは ViewTreeObserver.OnGlobalLayoutListener を用いて検知しました。
(分かりやすくするために一部コードを省いています)
private var screenHeight = 0

fun start(
    activity: Activity,
    onShow: () -> Unit,
    onHide: () -> Unit,
) {
    val contentView = activity.findViewById<View>(android.R.id.content)

    contentView.viewTreeObserver.addOnGlobalLayoutListener(
        object : ViewTreeObserver.OnGlobalLayoutListener {
            override fun onGlobalLayout() {
                if (contentView.height == 0) {
                    return
                }

                if (screenHeight == 0) {
                    screenHeight = contentView.height
                }

                when {
                    screenHeight == contentView.height -> {
                        onHide()
                    }
                    else -> {
                        onShow()
                    }
                }
            }
        })
}
まず、関数を実行したタイミングでメインウインドウの高さを取得します。
onGlobalLayout() が呼ばれる毎にメインウインドウの高さをチェックして、はじめの高さと同じならキーボードは表示していないものとみなします。
この処理はリスナーが登録されている間は動き続けるので、リスナーを解除する処理が別途必要です。
また、onShow/onHide も何度も呼ばれるのでフラグなどで回避する必要があります。
キーボードの動きに合わせて制約をつける
キーボードの動きが検知できるようになったので、動きに合わせて適切な箇所にコメントの制約をつけます。
キーボードに制約をつける
キーボードと表現していますが、実際にはレイアウトのルートに制約をつけています。
fun View.constraintToKeyboard(
    root: ConstraintLayout,
    margin: Int,
    constraintTo: ConstraintTo
) {
    ConstraintSet().apply {
        clone(root)
        when (constraintTo) {
            ConstraintTo.ON_ROOT -> {
                // nothing
            }
            ConstraintTo.ON_SCREEN -> {
                // nothing
            }
            ConstraintTo.UNDER_SCREEN -> {
                clear(this@constraintToKeyboard.id, ConstraintSet.TOP)
            }
        }
        connect(
            this@constraintToKeyboard.id,
            ConstraintSet.BOTTOM,
            ConstraintSet.PARENT_ID,
            ConstraintSet.BOTTOM,
            margin
        )
        connect(
            this@constraintToKeyboard.id,
            ConstraintSet.END,
            ConstraintSet.PARENT_ID,
            ConstraintSet.END,
            margin
        )
        applyTo(root)
    }
}
コメントの下部と右側の制約をコントロールします。
コメントの上部に制約がついていると意図した挙動にならないため、コメントがプレイヤー下の場合のみ上部の制約をクリアします。また、コメントの右側の制約はいいねボタンにつけられているので、レイアウトのルートに制約をつけかえます。
スクリーンに制約をつける
fun View.constraintToScreen(
    root: ConstraintLayout,
    screen: View,
    button: View,
    margin: Int,
    constraintTo: ConstraintTo
) {
    ConstraintSet().apply {
        clone(root)
        when (constraintTo) {
            ConstraintTo.ON_ROOT -> {
                connect(
                    this@constraintToScreen.id,
                    ConstraintSet.BOTTOM,
                    ConstraintSet.PARENT_ID,
                    ConstraintSet.BOTTOM,
                    margin
                )
            }
            ConstraintTo.ON_SCREEN -> {
                connect(
                    this@constraintToScreen.id,
                    ConstraintSet.BOTTOM,
                    screen.id,
                    ConstraintSet.BOTTOM,
                    margin
                )
            }
            ConstraintTo.UNDER_SCREEN -> {
                clear(this@constraintToScreen.id, ConstraintSet.BOTTOM)
                connect(
                    this@constraintToScreen.id,
                    ConstraintSet.TOP,
                    screen.id,
                    ConstraintSet.BOTTOM,
                    margin
                )
            }
        }
        connect(
            this@constraintToScreen.id,
            ConstraintSet.END,
            button.id,
            ConstraintSet.START,
            margin
        )
        applyTo(root)
    }
}
前のコードと同様にコメントの下部と右側の制約をコントロールします。 コメントが動画プレイヤー下の場合は、下部の制約をクリアし上部に制約をつけます。コメントの右側の制約もルートからいいねボタンの左側につけかえます。
これで次のような挙動を実装することができました。
| 通常 | キーボード表示 | サジェスト表示 |
|---|---|---|
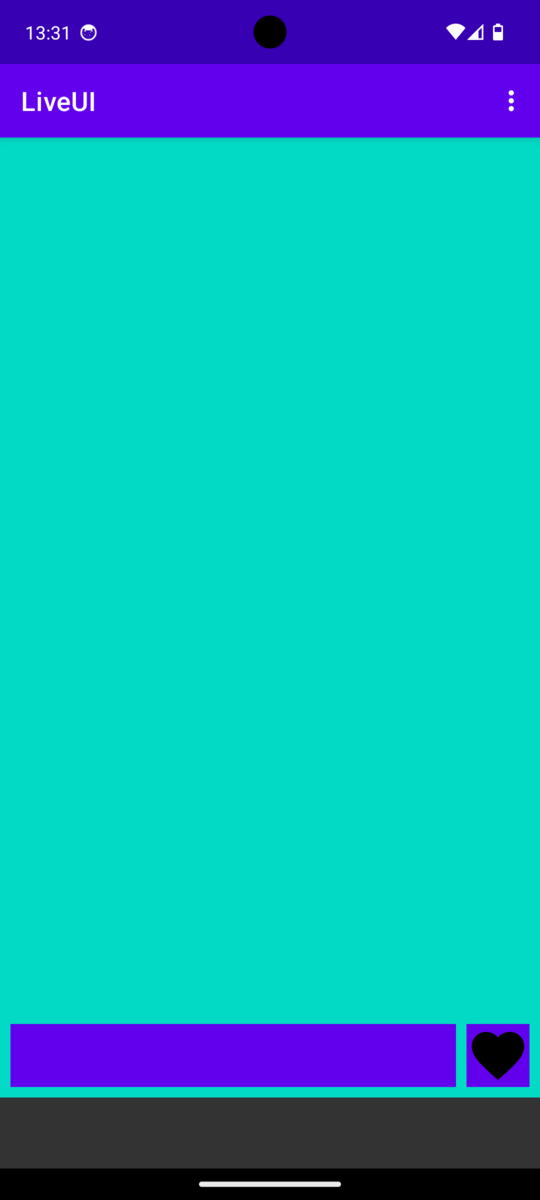 |
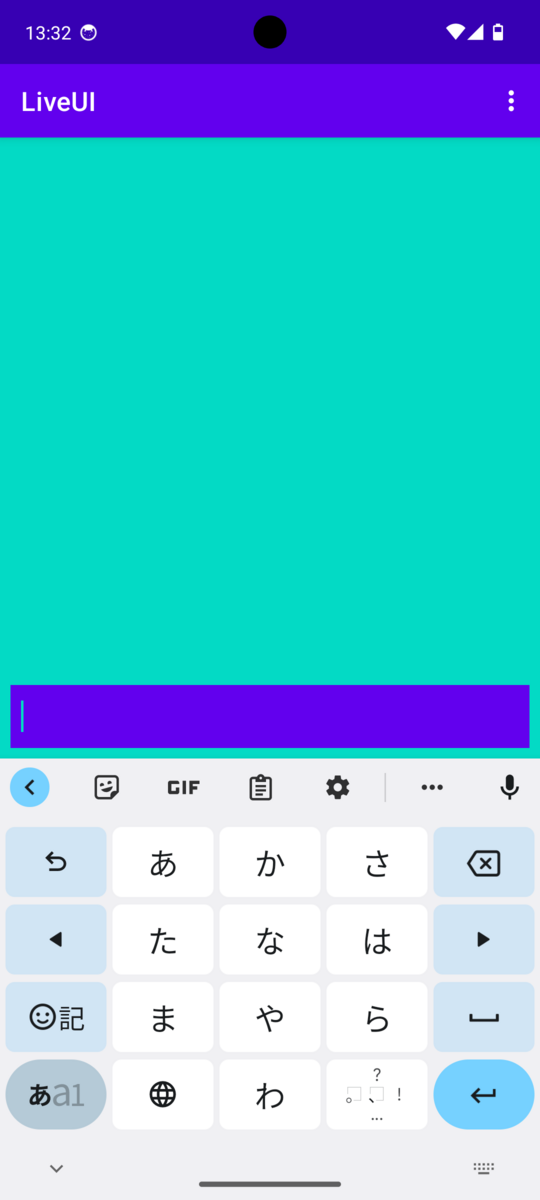 |
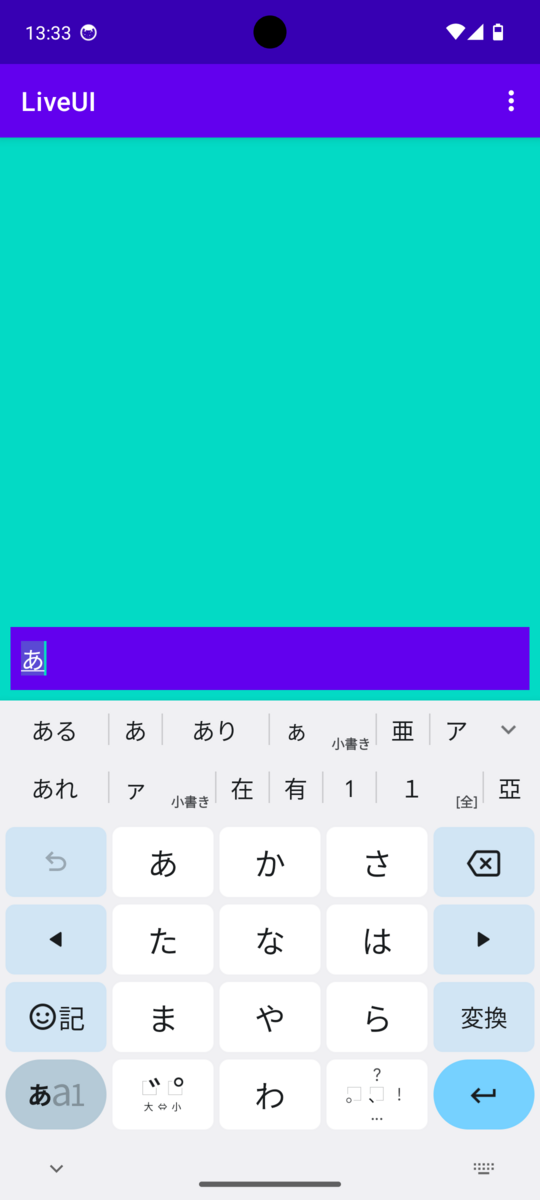 |
最後に
特定の View をキーボードや他の View に制約をつけかえる方法を紹介しました。
実際の挙動は、ぜひ DELISH KITCHEN のライブ配信で確認してもらえたらと思います。
この記事がどなたかのお役に立てれば幸いです。